Database de-identification
This guide describes the steps for fully de-identifying a production database.

Before starting database de-identification use case, check the video below that provides a short introduction to data generators:
Syntho helps customers ensure columns containing personally identifiable information (PII) are properly managed and governed. It provides fast discovery and de-identification of PII columns, replacing their contents for entities such as person names, locations, social security numbers, phone numbers, financial/health data and more.
Below, you will find the most important features widely used by customers, which we will cover in this guide:
Use the PII scanner to identify sensitive columns.
De-identify PII using Mockers or Exclude.
Deploy consistent mapping with Syntho mockers.
Use the newest feature calculated columns to perform a wide range of operations on data.
Utilize the foreign key scanner to inherit foreign keys from the database.
Use the Sync button to sync the source schema with the workspace.
For prerequisites check Prerequisites or watch the video below.
Healthcare Database
Let’s assume the customer operates in the healthcare industry. The customer's database comprises medical data about their patients, medications, supplies, devices, etc. The below screenshot displays all tables residing in the database on the left side and a sample of rows in the patients table:
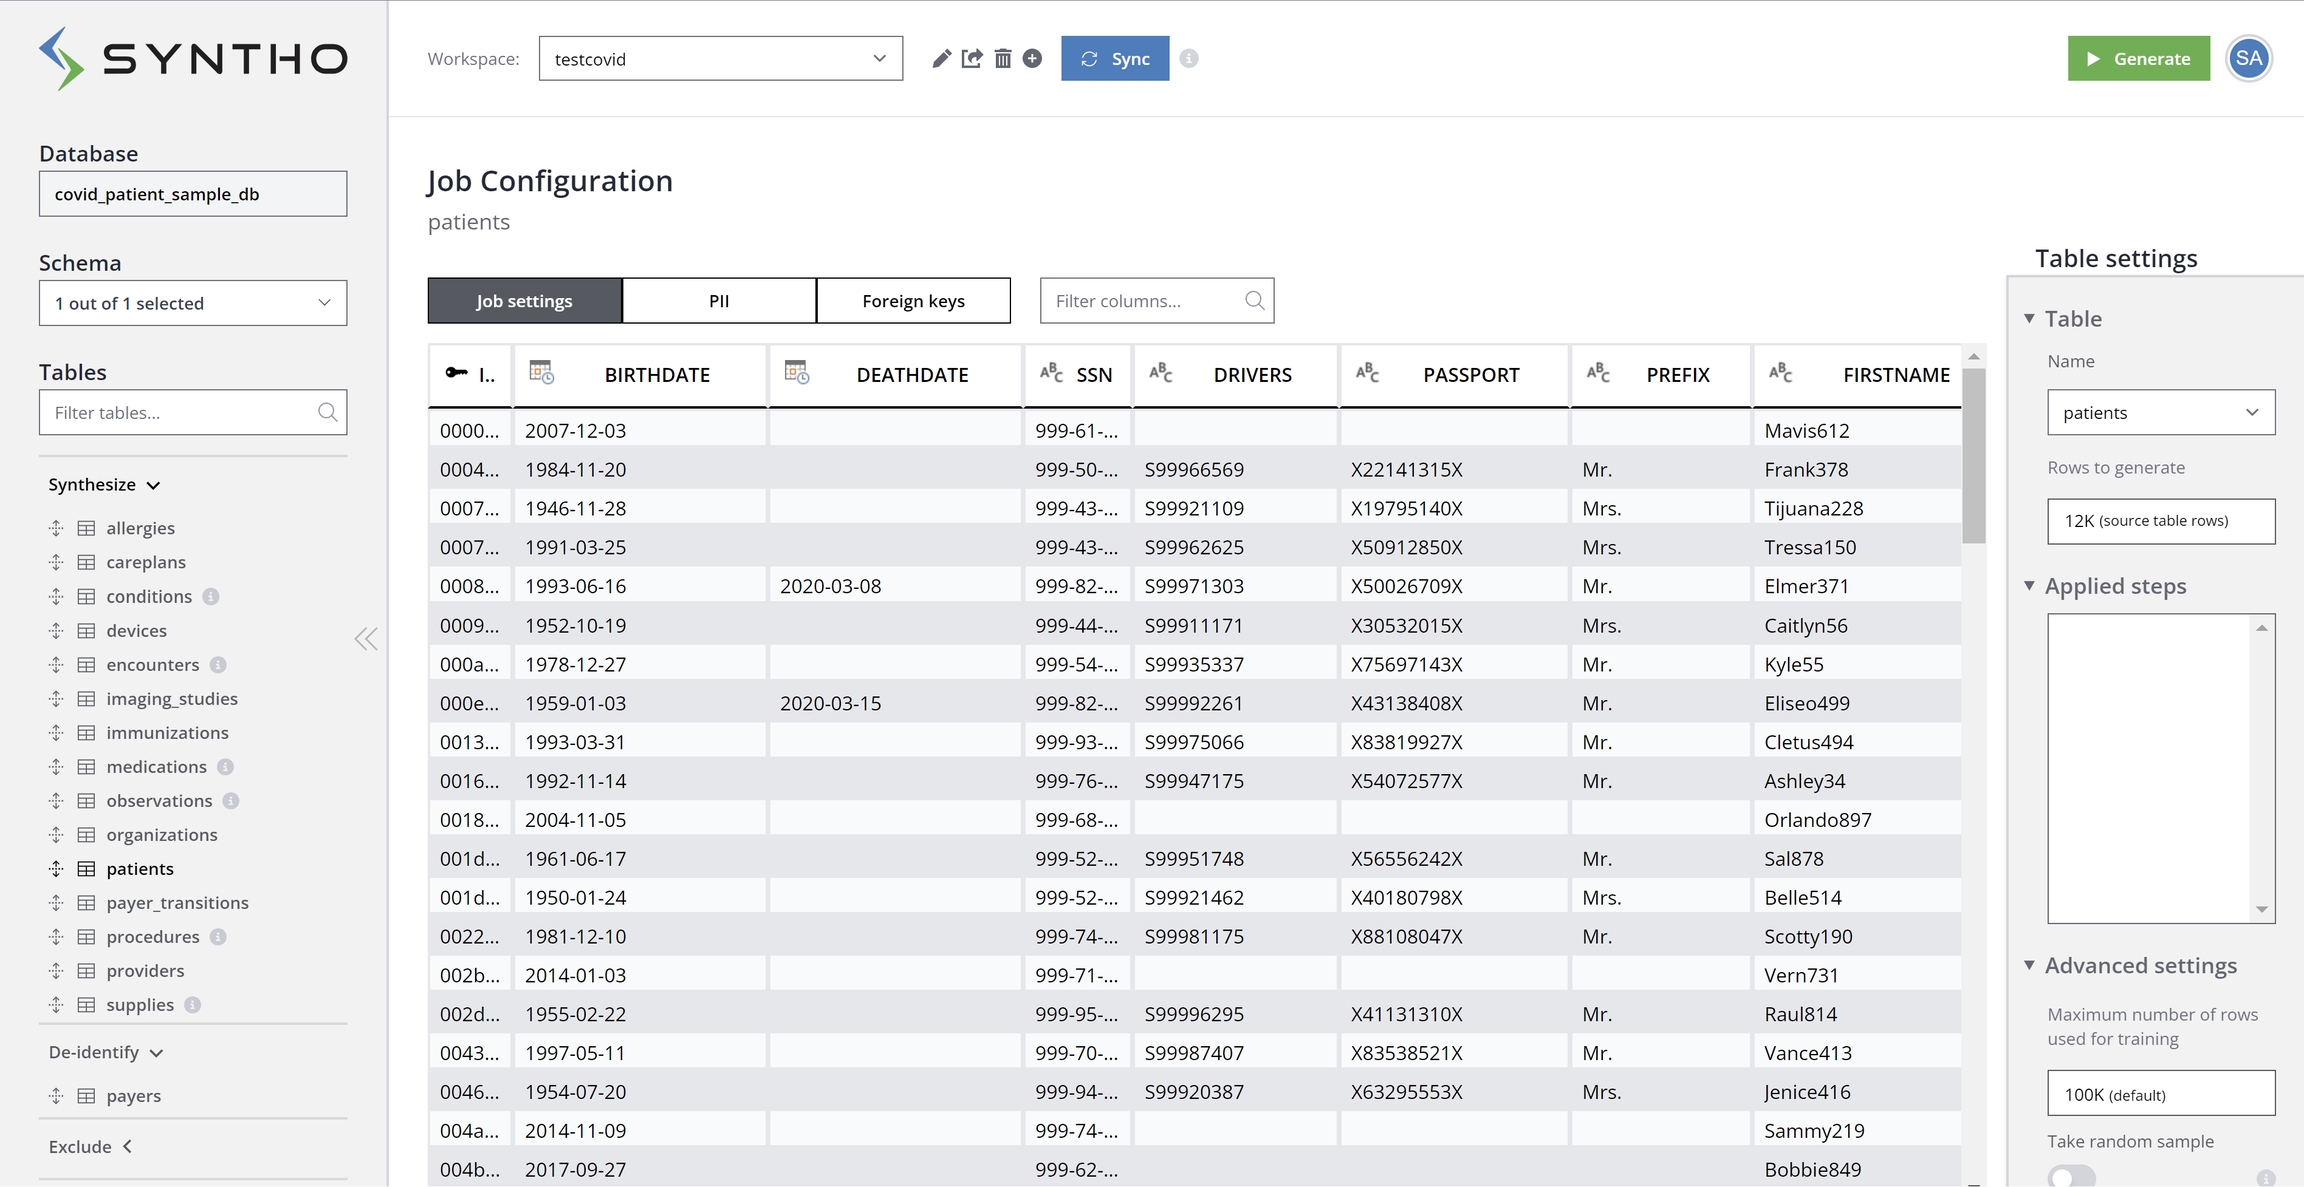
You can de-identify by transforming column data to remove or mock PII via two options: Mockers and Exclude. The default column mode is Duplicate, meaning the column is copied directly without alteration. However, this setting can be changed to either mock data with Mockers or exclude specific columns.
Create or open the workspace with the columns that you want to de-identify.
To preserve all cross-table relationships, hold
CTRL + SHIFT + ALT + 0to open the Workspace Default Settings menu. If this short key is reserved on your system, you can add/global_settingsto the end of the workspace URL.Under the
key_generation_methodentry, set the value either to:“duplicate“: to preserve cross-table relationships and duplicate the original key values.
“hash“: to preserve cross-table relationships and hash the original key values.
On the Job configuration panel use
CTRLorSHIFTto select multiple tables simultaneously.Access the column settings for the selected table.
By default, the column mode is set to Duplicate.
Change the column mode to one of the following options:
Mocker: Use this option to fill the columns with mock data.
Exclude: Choose this option if you don’t want to include specific columns in the duplicated table.
Using these modes, you can safely de-identify PII by either replacing it with mock data (Mockers) or excluding it (Exclude) from the target database (for more information, see Configure column settings).
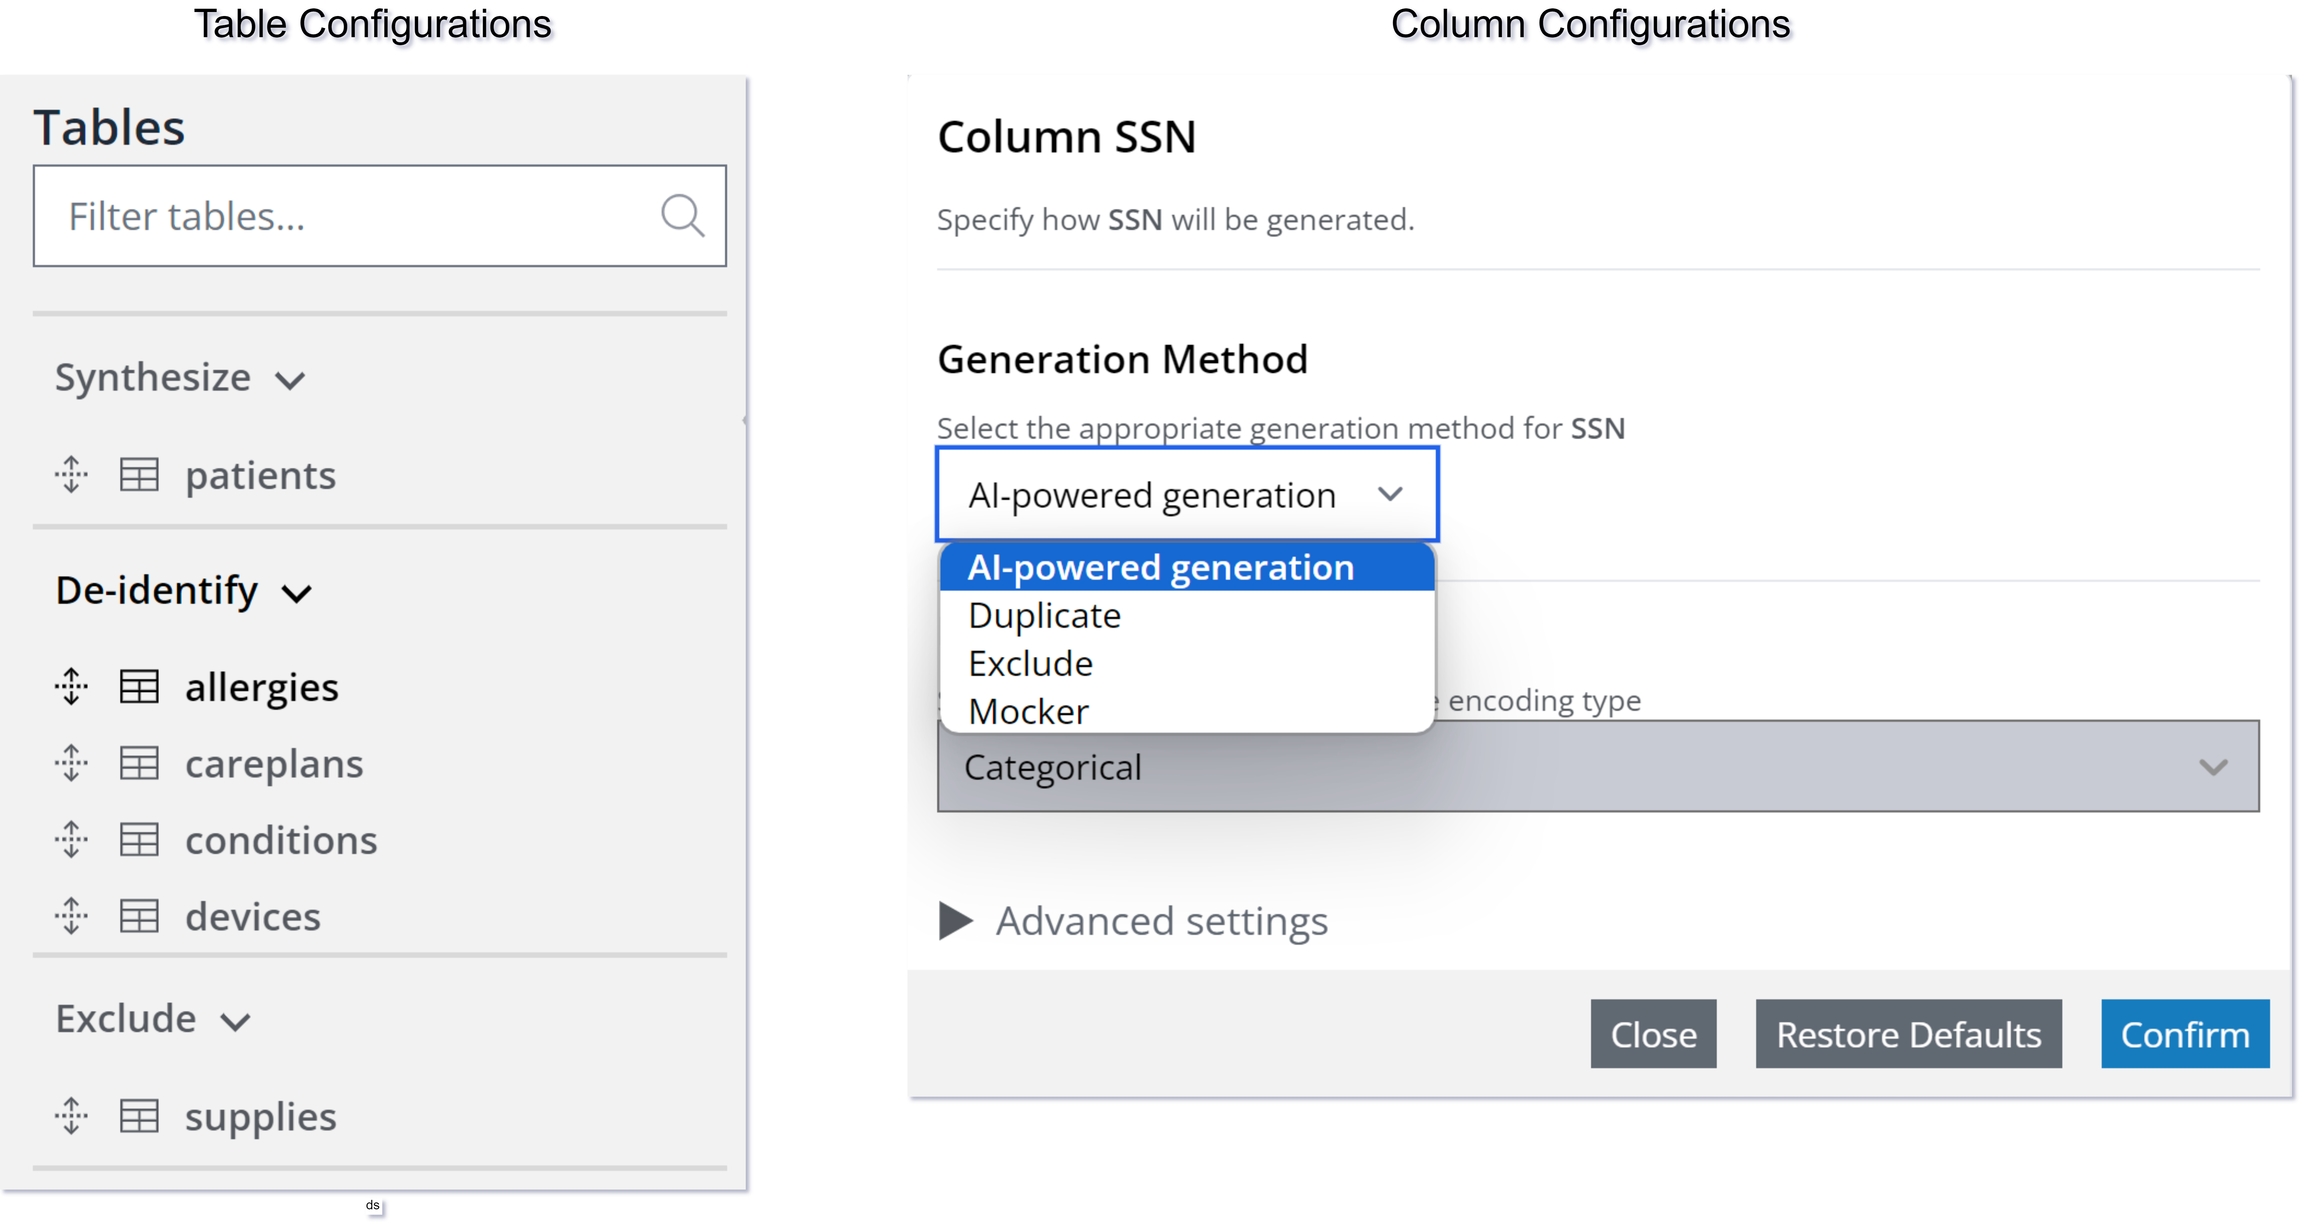
For clarity, the below illustration shows the distinction between table and column configurations.
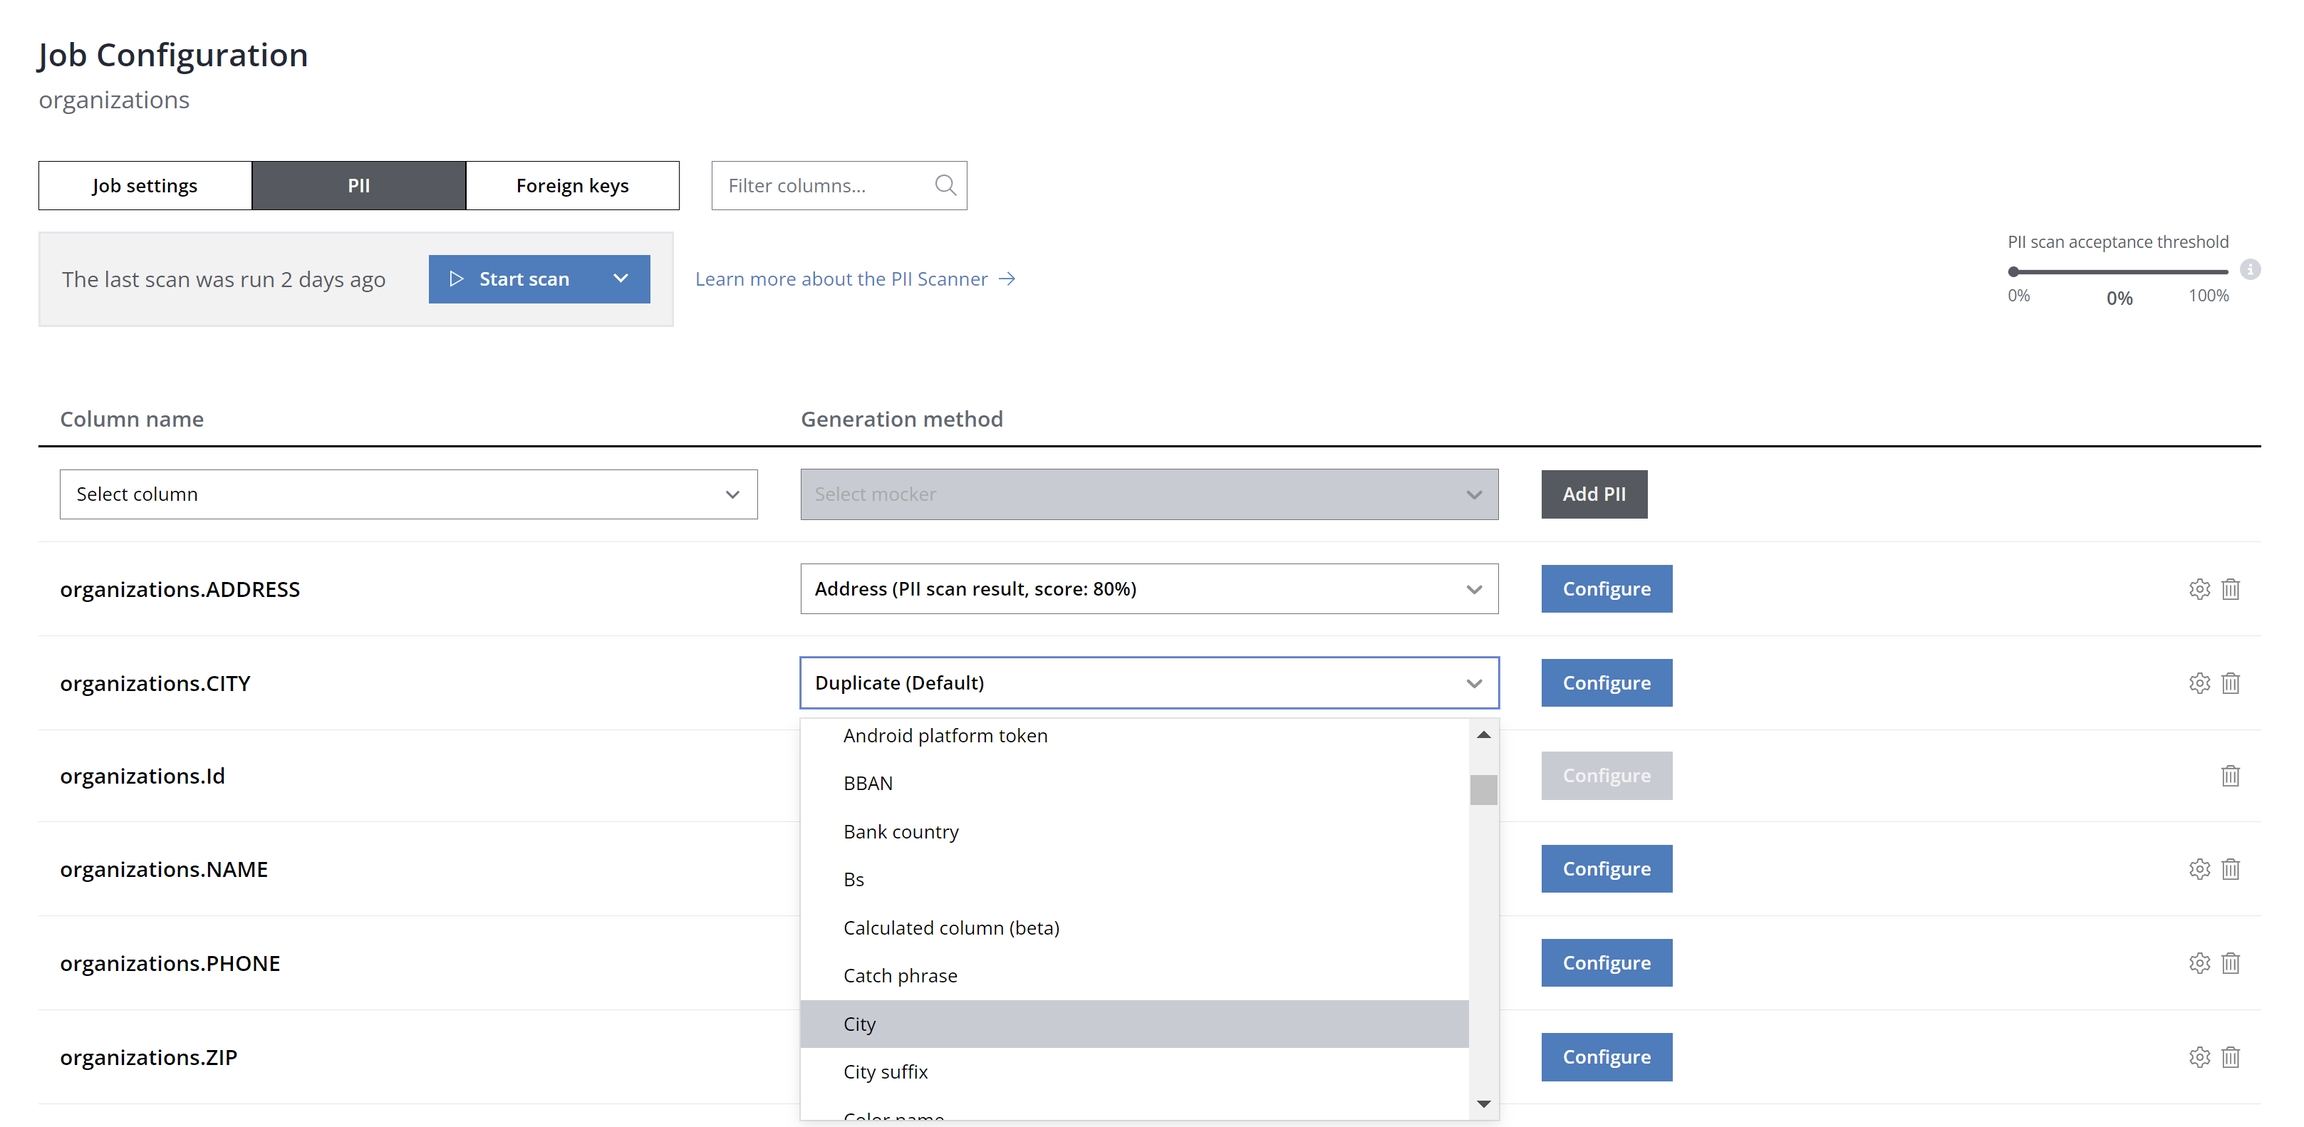
In the PII tab, you can add new columns to the list of PII columns, either manually or by using Syntho's PII scanner. You have the option to manually label columns containing PII by selecting the column name and optionally choosing a mocker to apply. Clicking "Confirm" will mark the column as containing PII and confirm the mocker selection.
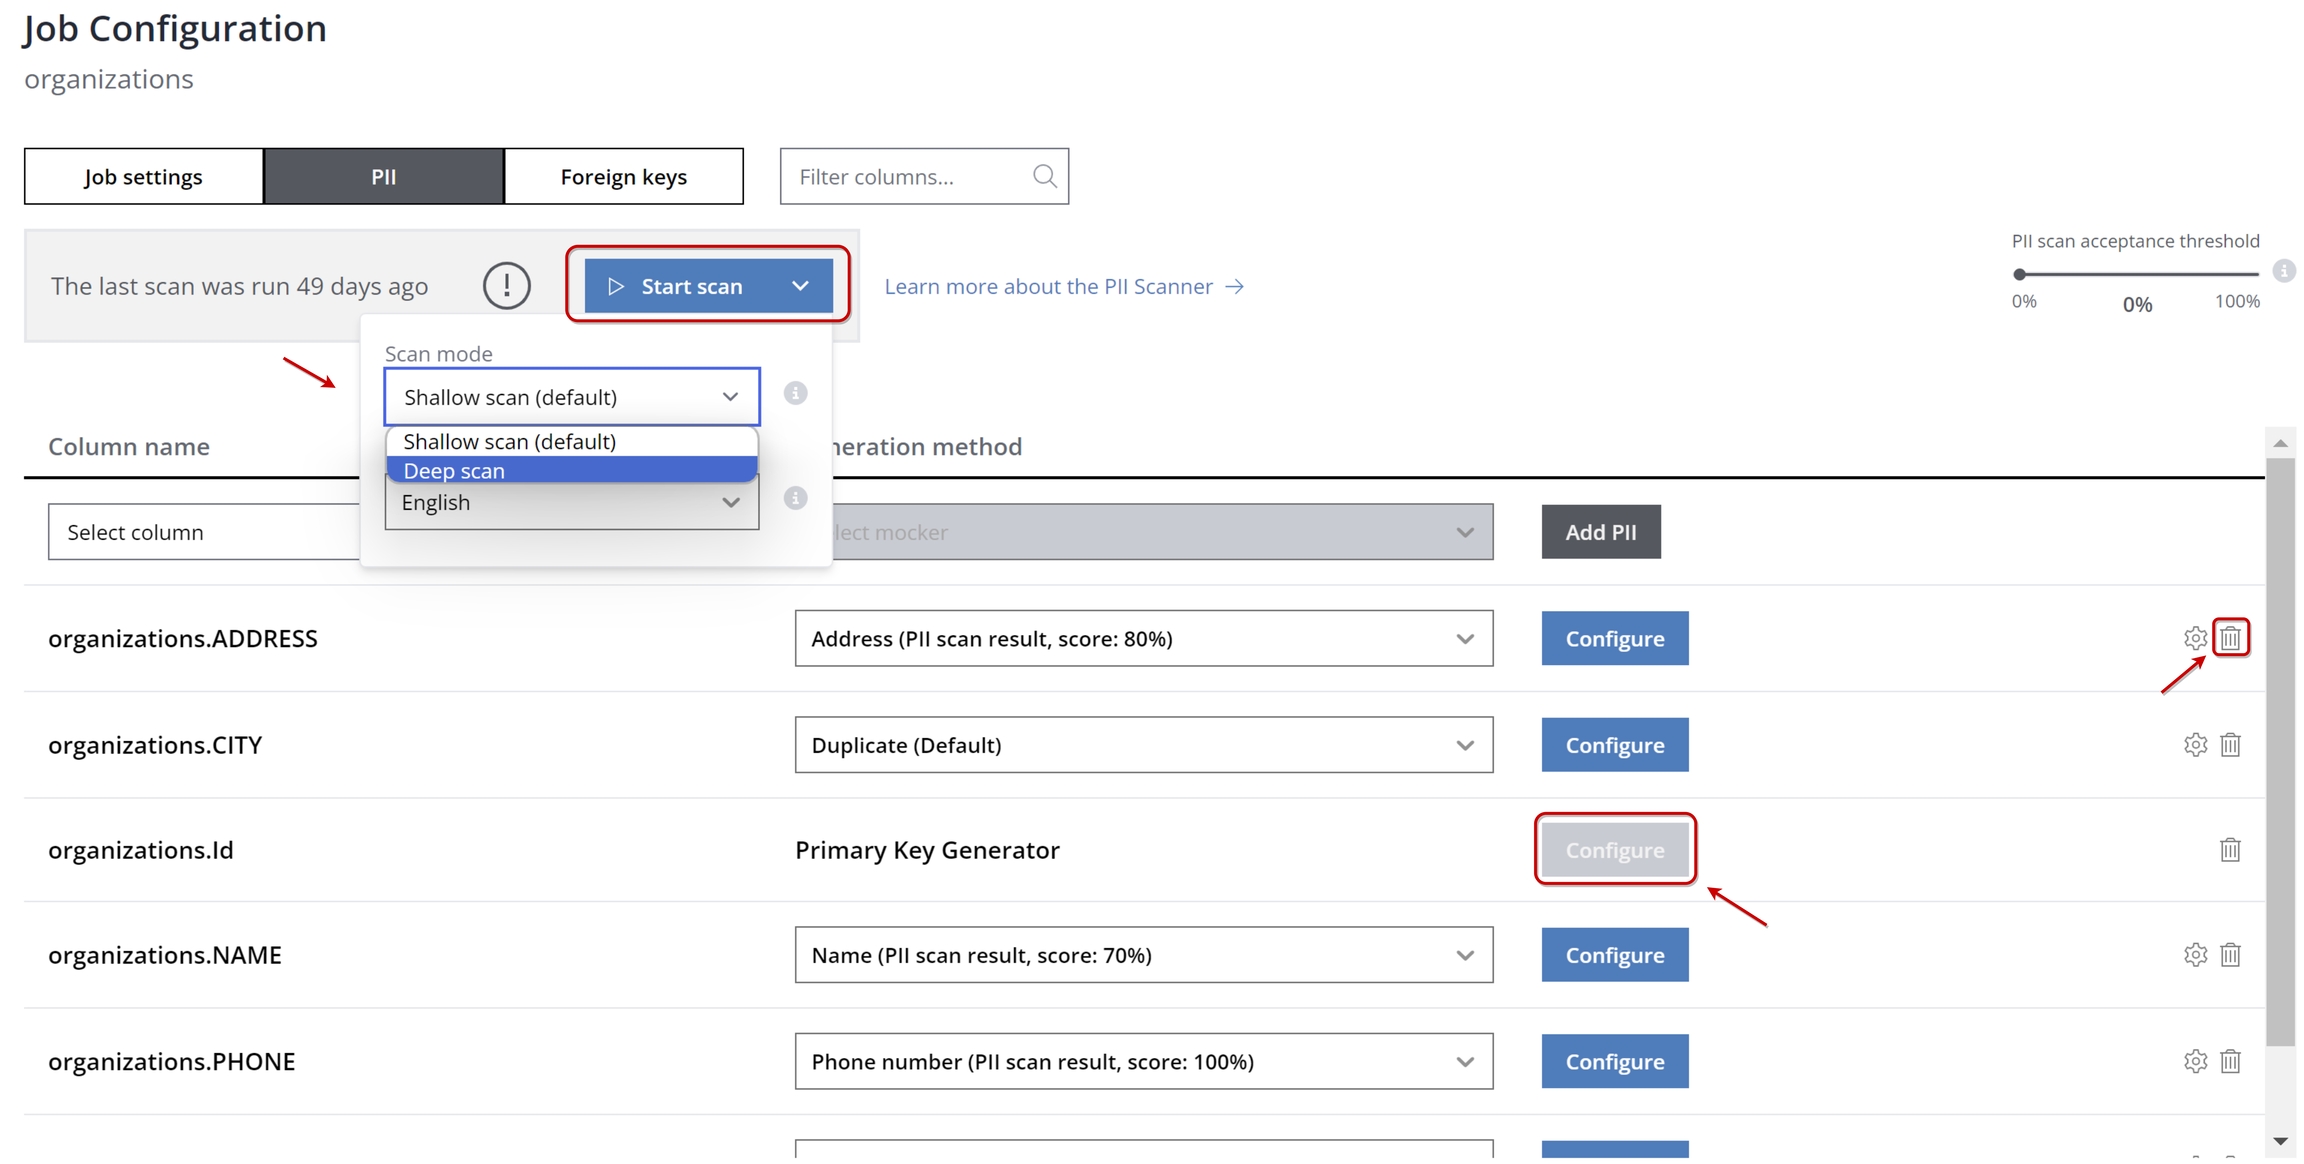
Alternatively, deploy automatic PII discovery with the PII scanner. Launch a scan to detect PII across all database columns from the PII tab in the Job Configuration panel. Note that the scanner offers both Shallow and Deep scan modes:
The shallow scan assesses columns using regular expression rules to identify PII, optimized for speed but with variable accuracy.
The deep scan examines both metadata and data within columns for a thorough PII identification.
Following a deep scan, Syntho may reveal columns likely containing PII, assigning a probability score to each (e.g., 80% for the "ADDRESS" column).
To delete unwanted configurations, click the delete icon on the right side of the panel.
Clicking "Configure" opens a new window for column settings, detailed in the subsequent section.
For more information, please see - Automatic PII discovery with PII scanner.
De-identify using mockers & consistent mapping
After clicking the "Configure" button on PII tab, the window shown below will appear.
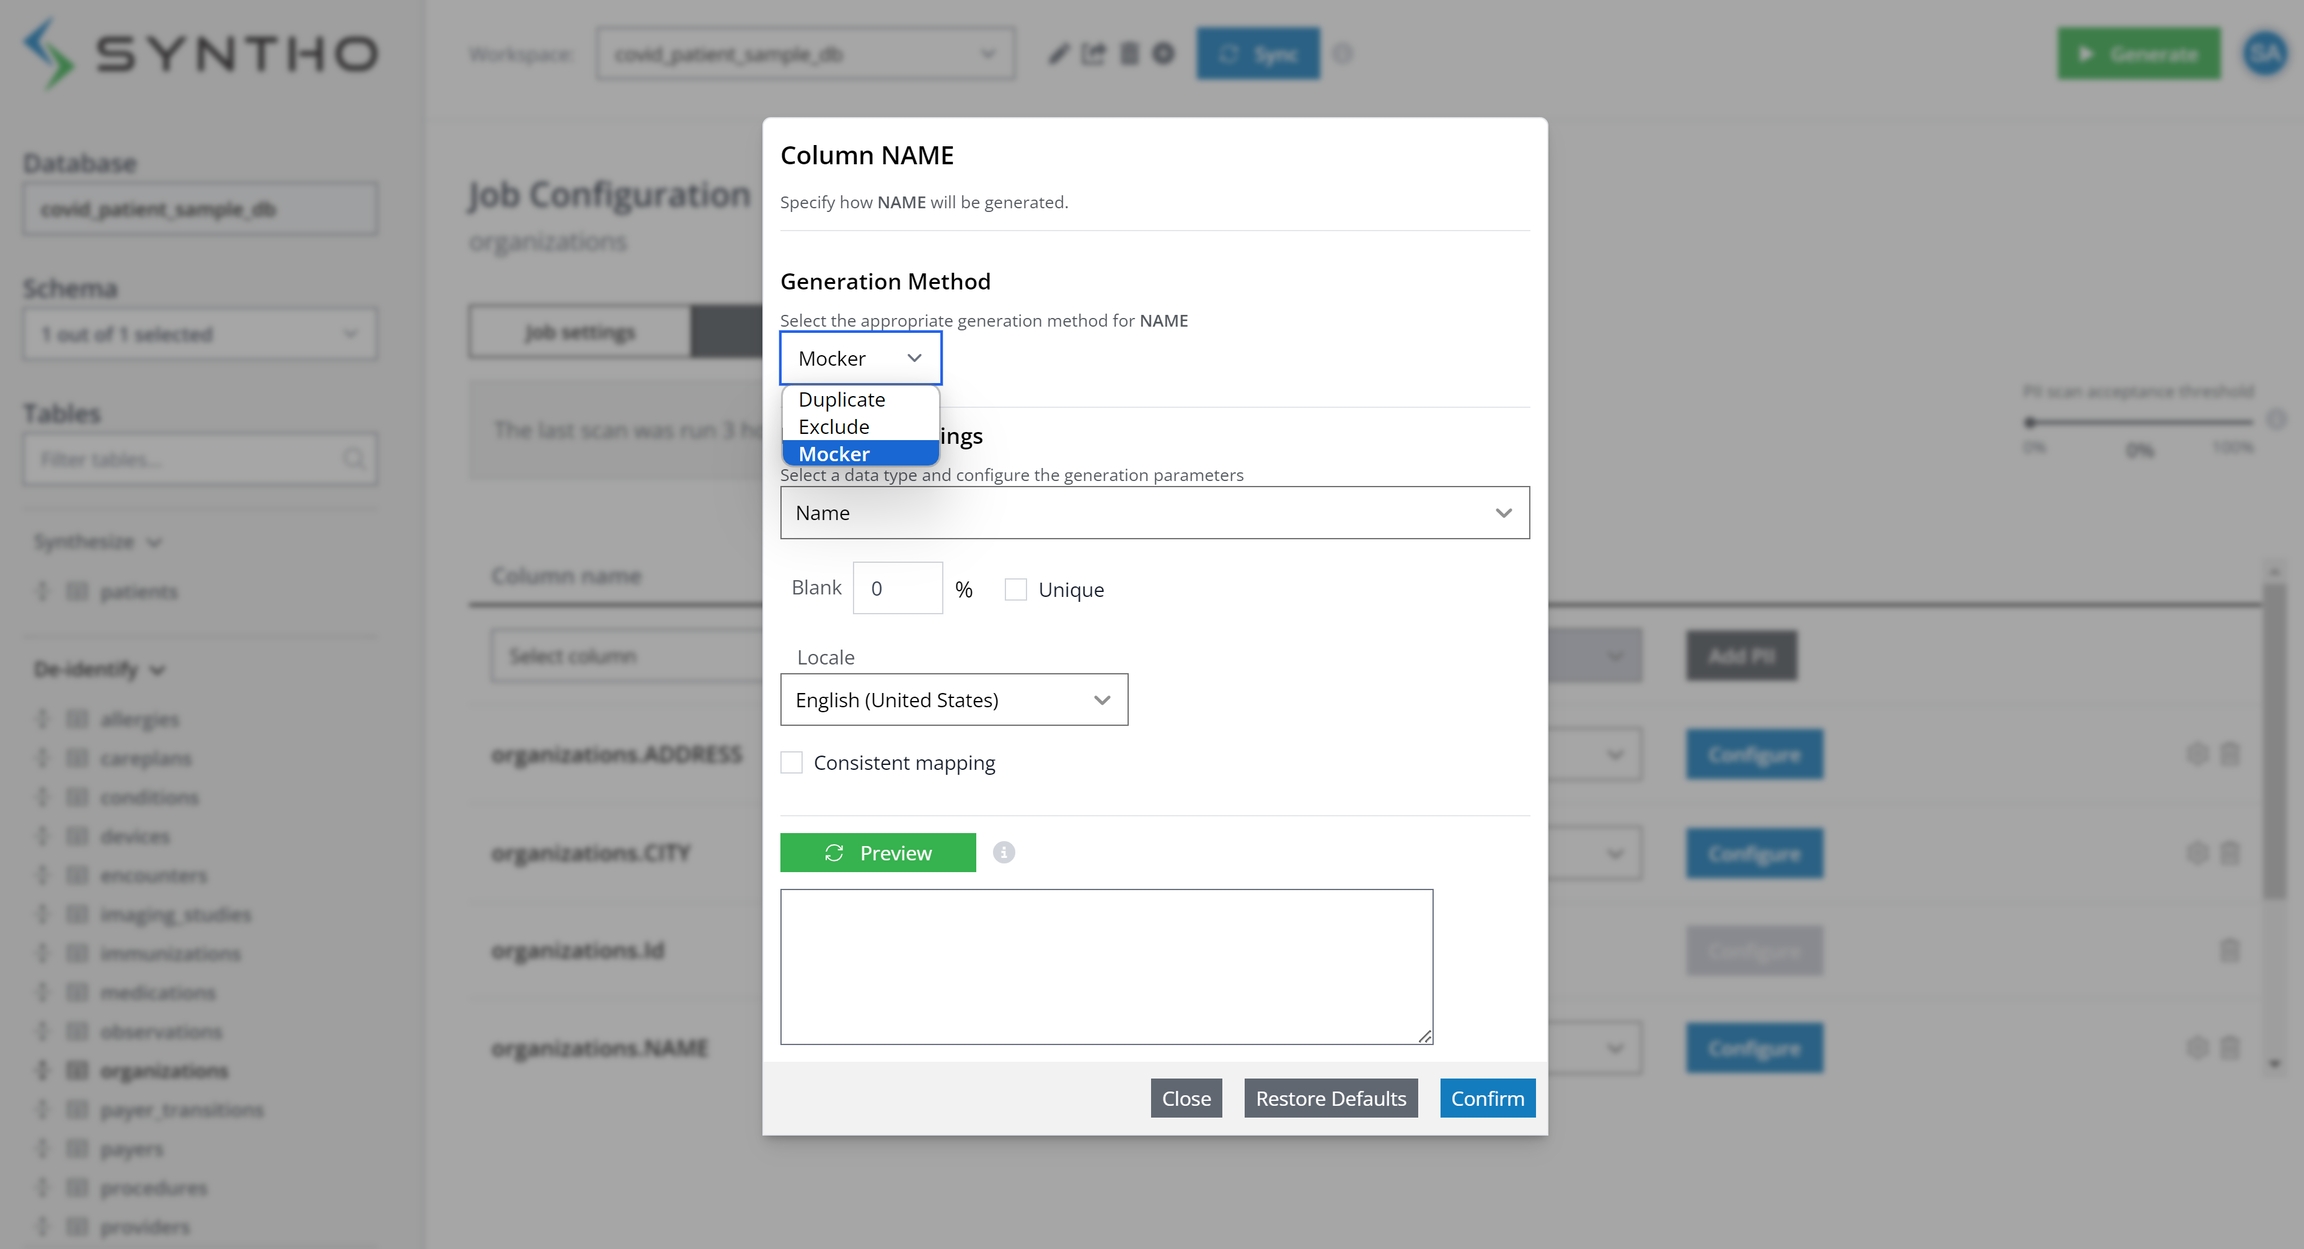
The above window can also be reached by clicking the column settings for the selected table. Please see below to find how to open the window.

For columns not identified as containing PII, such as the "COUNTRY" column, the default mode applied is Duplicate, meaning it can be safely duplicated to the destination database. However, for columns detected as containing PII, like "NAME", you can apply a Mocker.
To configure settings for the "NAME" column (as shown in the previous illustration), we opt for mock data over real names. The data type "Name" is automatically selected and we can also choose the "unique" option to ensure only unique values are generated.
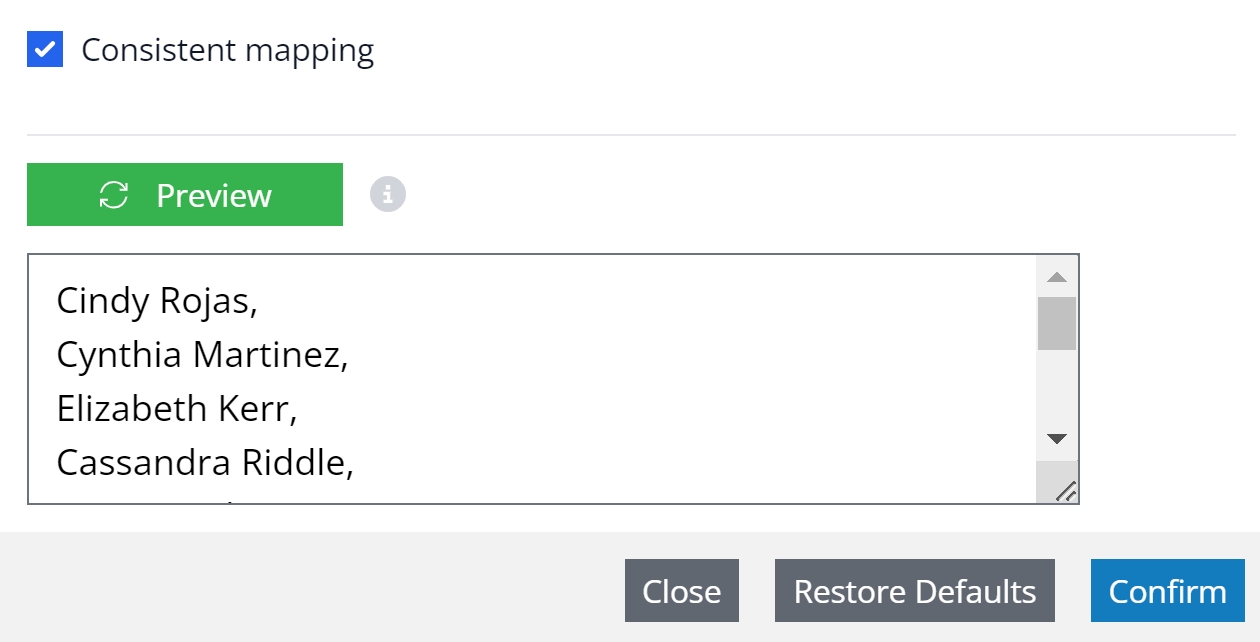
Consistent mapping, an advanced feature, generates identical mock data for each set of original values every time it's applied. For instance, the mock name "Jack" will replace "Alan" consistently, maintaining value consistency across tables, databases, and jobs.
By clicking the "Preview" button, you can view a preview of the mock data with the defined settings.
For more information, please check mockers & consistent mapping.
Truncate tables before each new data generation job
Users are required to manually TRUNCATE their tables in the DESTINATION database before initiating each new data generation job. If truncation is hindered due to existing constraints, these constraints should be temporarily disabled before truncation and then re-enabled afterwards. For instance, to facilitate the truncation process when foreign key constraints prevent it, use the following SQL commands: First, disable the constraints by executing SET FOREIGN_KEY_CHECKS = 0;, then TRUNCATE the table, and finally, re-enable the constraints with SET FOREIGN_KEY_CHECKS = 1;. This sequence ensures that tables are properly prepared for data generation without constraint violations.
De-identify using Calculated Columns
Another example is the first name mocker. Imagine having a table with a column for first names. However, the user wants to generate male mock data for male names and female mock data for female names based on checking their gender in the gender column. This request can be expressed using the formula below:
IF([Gender] = 'M', MOCK_FIRST_NAME, IF([Gender] = 'F', MOCK_LAST_NAME_FEMALE, 'nothing'))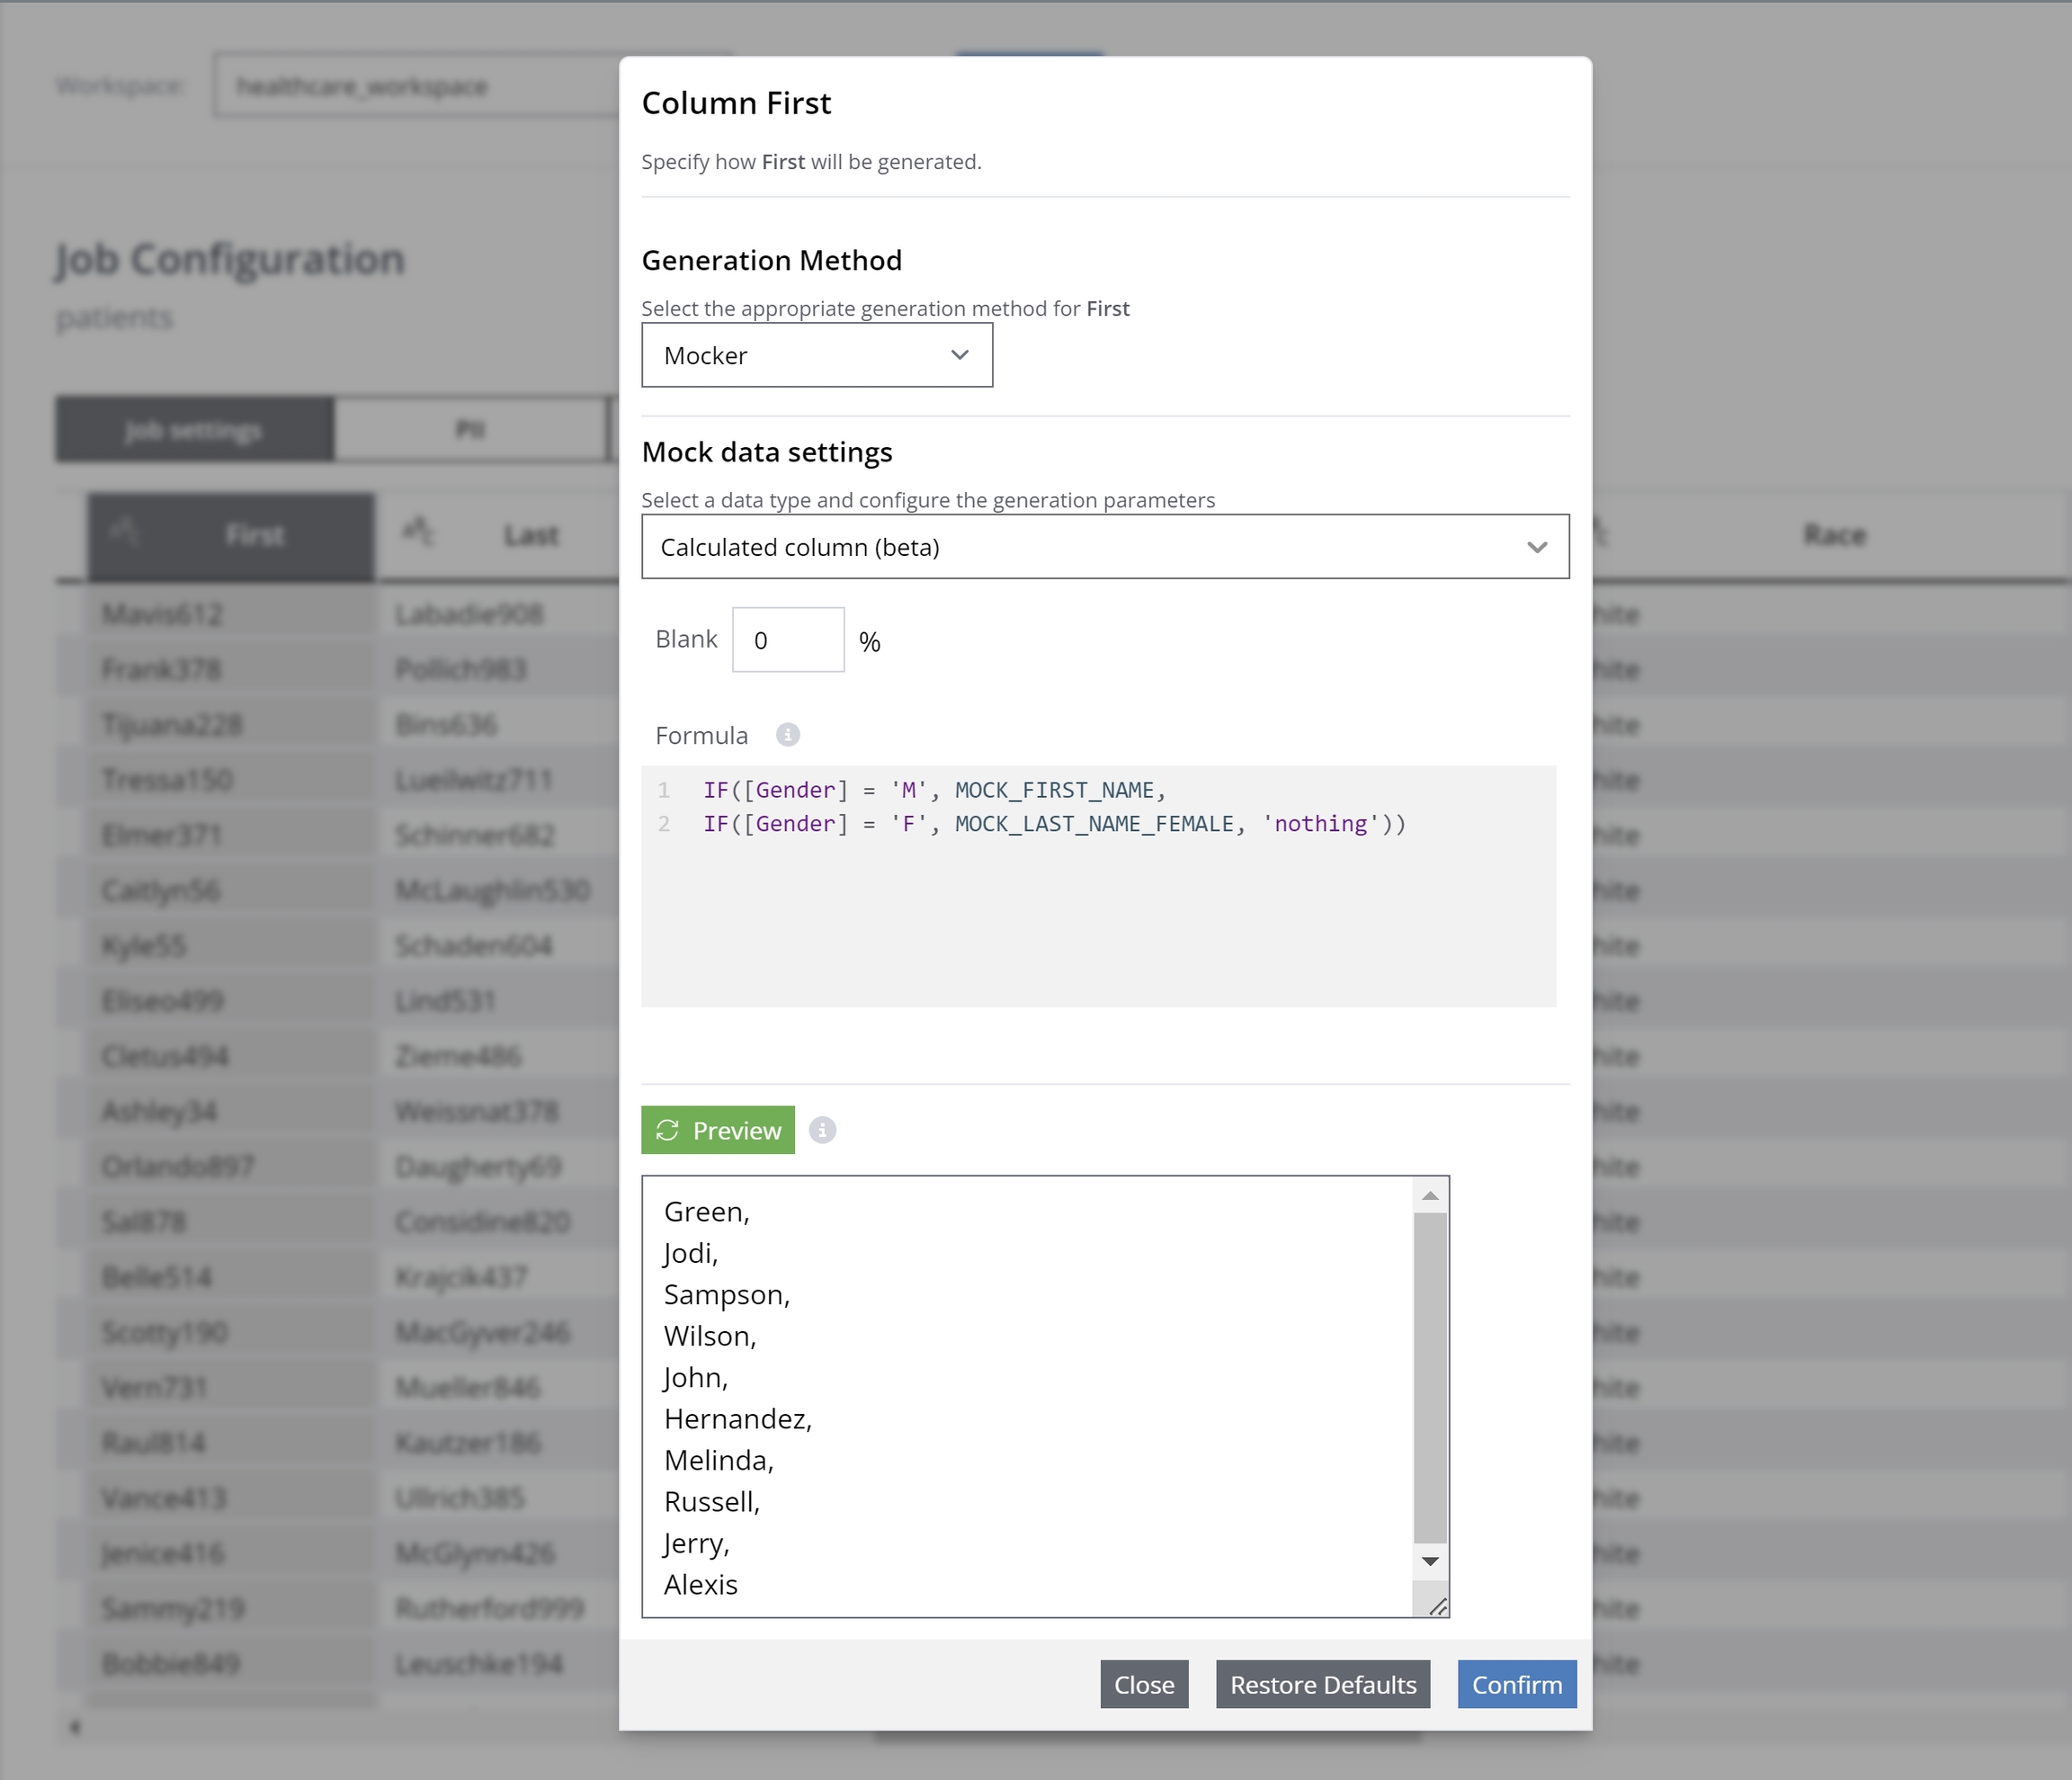
For more information, please see - Calculated columns.
The Foreign Key tab, adjacent to the PII tab, shows Syntho's automatic inheritance of foreign keys from your source database. If not explicitly defined, you can add them through import (JSON files), manually or scanning.

For databases without explicit foreign key relationships, Syntho allows you to add virtual foreign keys manually. To do this, select the tables and columns for the foreign and primary keys under the Foreign Keys tab and click on "Add foreign key" to finalize.
To streamline setup, you can import foreign keys through a JSON file. Just click "Upload foreign keys", use the Browse button to select your file, and click "Import" to update your Foreign Keys list.
Syntho also offers a foreign key scanner for discovering potential virtual foreign keys, useful in large databases. To initiate a scan, go to the Foreign Keys tab, press "Scan," apply filters if needed, and confirm to start. You can then review, confirm, or delete any identified foreign key candidates.
For more information, please see Manage foreign keys.
Keep your source database in sync with your workspace
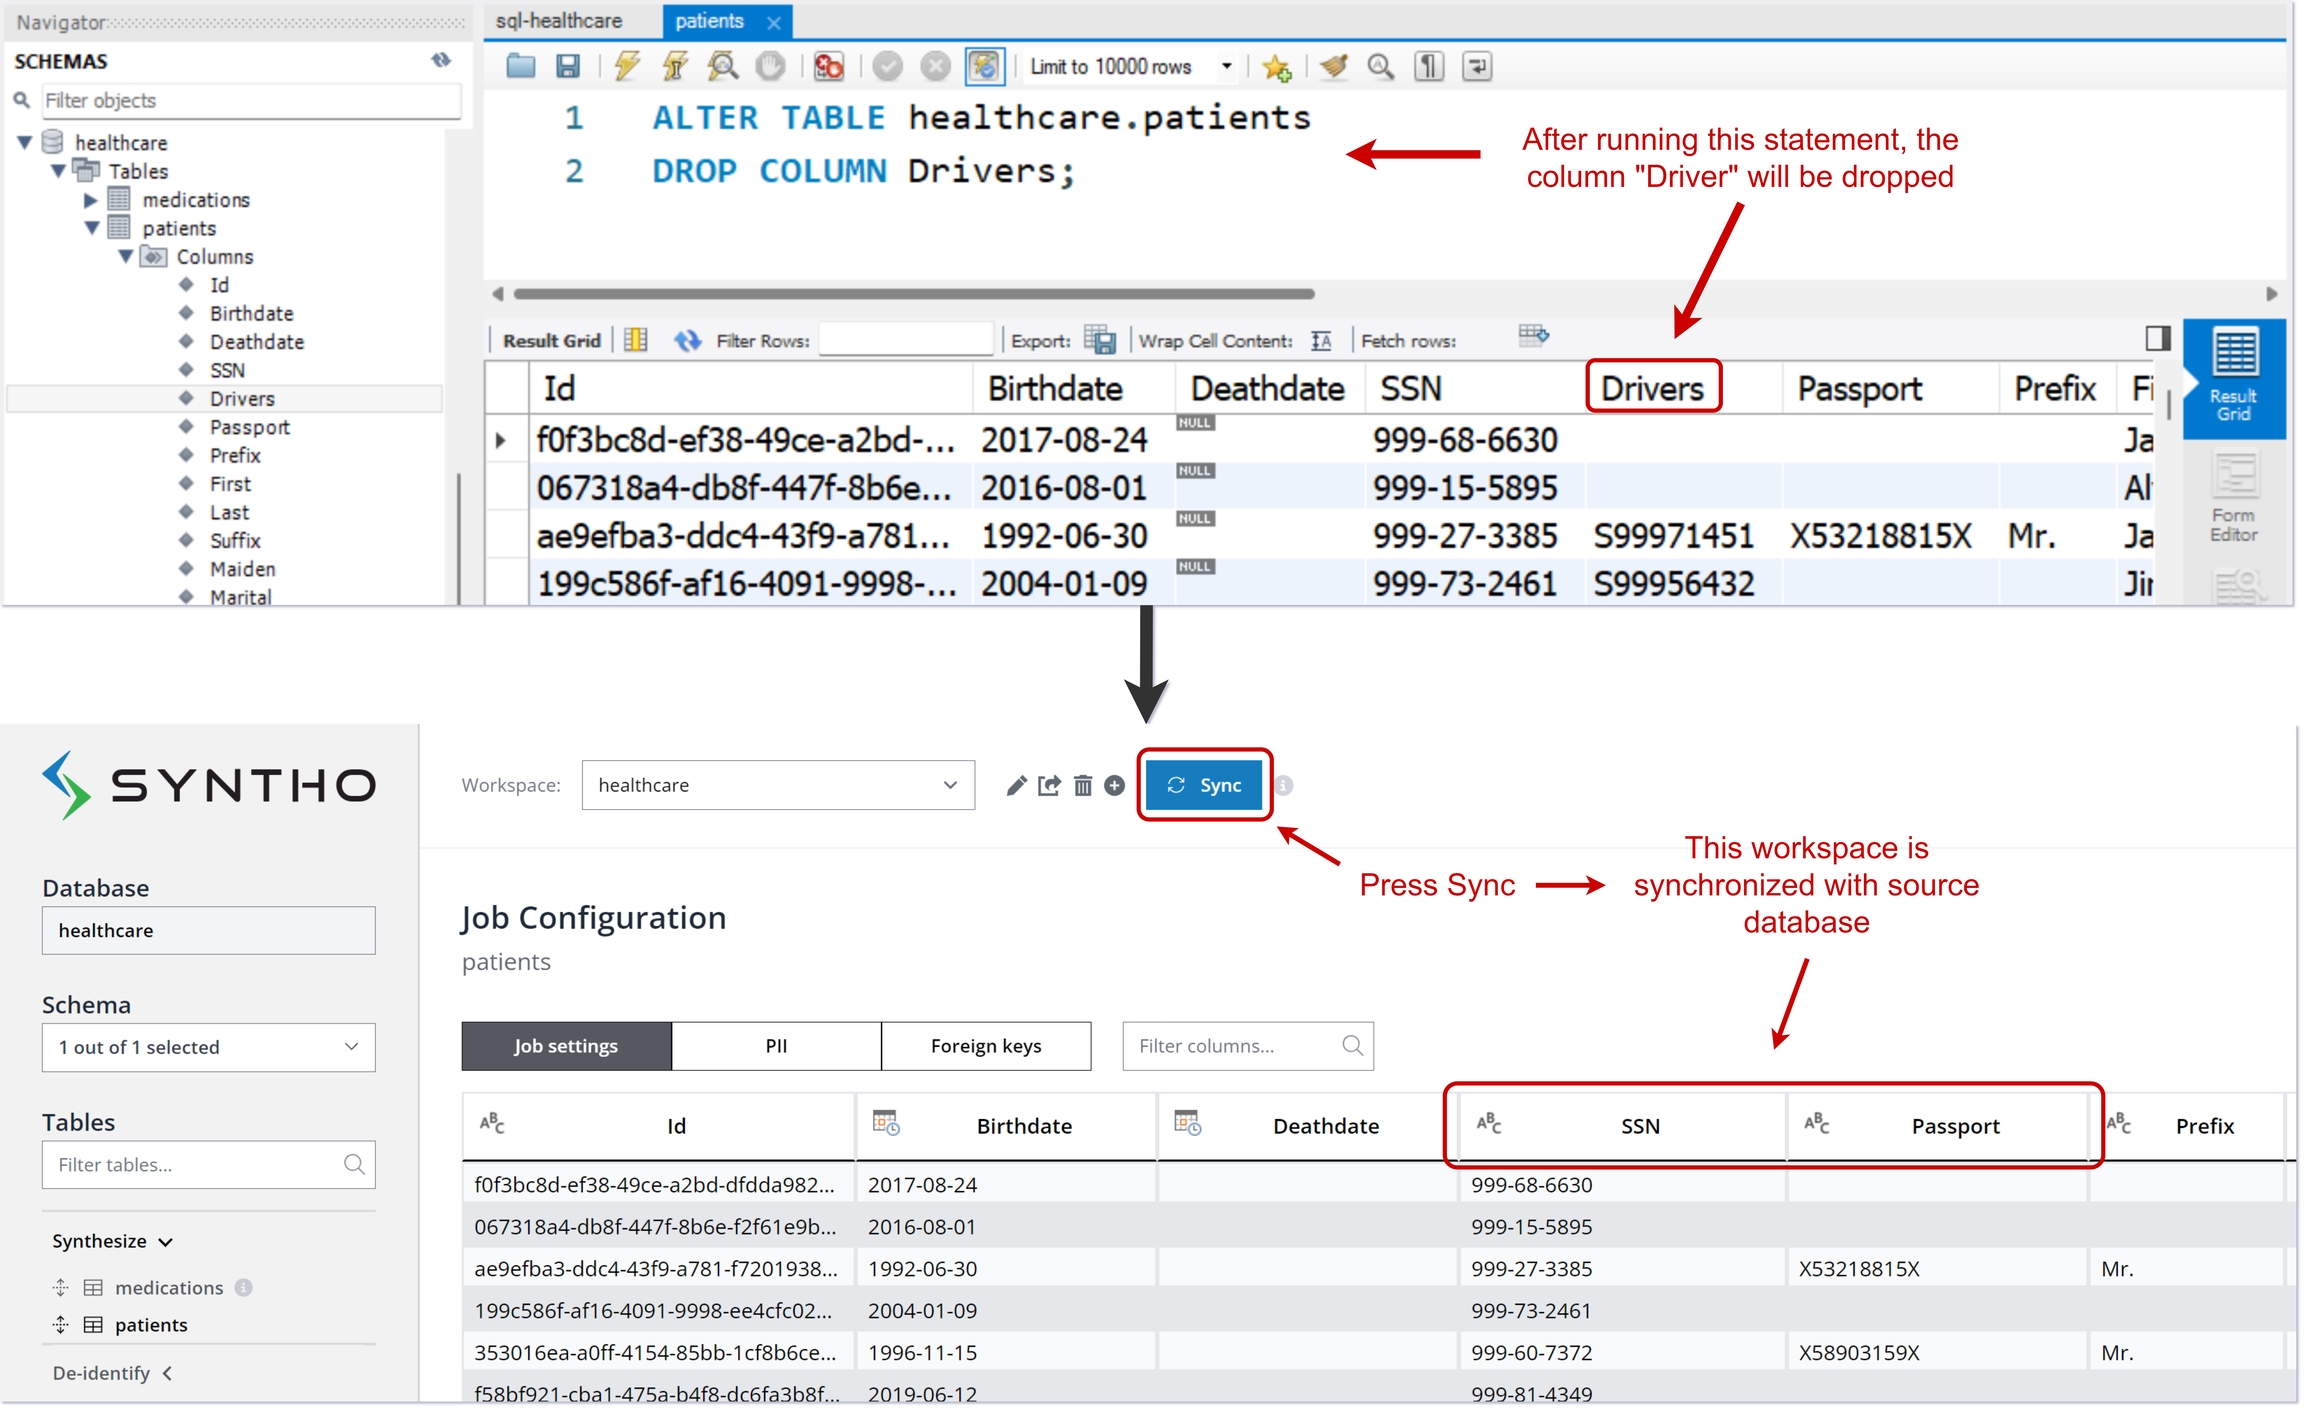
The Sync button is helpful for reflecting frequent schema changes in Syntho. It ensures the workspace mirrors the current state of the source database, accommodating additions, deletions, and modifications to the source database.
Let’s assume we have a source database called healthcare and the column “Drivers” was removed from the table patients in the source MySQL database. After removal of the column, when you press Sync button, it will show the current version of the source database.
Last updated
Was this helpful?

