Table view
The Table View displays source data for a single table or view.
To display Table View, on the configuration panel, click Table view. From Table View, you can view and update the table and column configuration.
Table selection menu
On the left panel, the Table selection menu section lists all tables in your database. You can select any table for which the source data will be displayed in the screen center, for which you can then configure the table and column settings.
Click Edit to choose which tables to include or exclude.
Include: data of included tables will be transferred to the destination database.
Exclude: data of excluded tables will not be transferred.
Hint: To include or exclude several tables at once, use the Bulk option.
Selecting and configuring a generator for a column
Select the icon next to a column in the table to open the Column Parameters modal, where you can assign and configure the column generator.
When you change the column generator, Syntho updates the protection status panels.
For more information on configuring generators, see Generators.
Configure table settings
Adjust the number of rows to generate
By default, Syntho generates the same number of rows in the destination table as in your source table.
To change the number of rows to generate for a table:
Go to Rows to generate field in the Table settings menu right on the Table view panel.
Update the field value to the desired number of destination rows.
The behaviour when adjusting the destination table row count is the following:
For tables that are included:
If an AI synthesize or mockers are applied, Syntho will generate the exact number of rows you specify.
If Duplicate is applied to any column, it generates the specified number of rows (
n) by duplicating from the original table (n_original).If
n≤n_original, the original rows are copied as they are.If
n>n_original, the originaln_originalrows are copied, and any additional rows are randomly sampled (with replacement) from the original rows
For tables that are excluded, Syntho does not generate any rows (since the table is excluded).
Considerations for adjusting the number of rows to generate
The Rows to generate field will be disabled if the table doesn't support oversampling, which can be due to the following:
The table has another method than Generate as the applied key generator method.
If its number was previously changed and the table doesn't support oversampling anymore, the value will be reverted to the original one.
Adjusting Rows to generate could cause conflicts with foreign key constraints in your destination database.
Advanced table settings
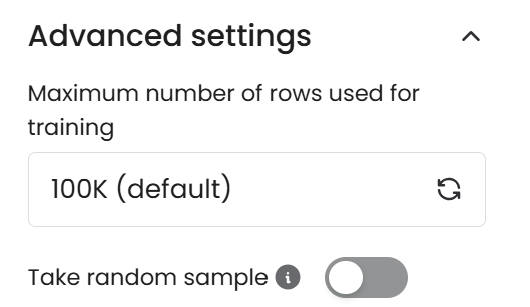
Unfold Advanced settings under the Table settings to view and adjust settings on the table-level. Note that these settings will only be relevant for any columns that use AI synthesize.
You can adjust the following advanced table settings:
Maximum rows used for training: The maximum number of rows to be used for training. Using fewer rows can speed up the process, but may come at the cost of lower synthetic data utility.
Take random sample:
On: takes a random sample of rows used for training. Note that choosing this option can cause a data generation job to run significantly longer, depending on the database.
Off (default): takes the top rows as defined in the database.

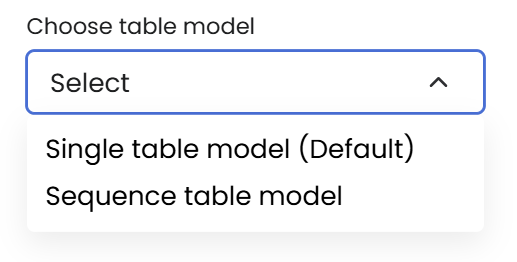
Advanced settings in Table settings view Choose Table Model: The generative AI model that will be applied to all columns using AI synthesize. This feature allows users to flexibly manage multiple table models by selecting between the following options:
Single table model
Sequence table model
Please note that you can create multiple sequence models as long as the foreign key (FK) relationship limit between the tables is present.

ORDER BY
Hive only
In the Table Settings panel, a dropdown field allows users to specify which columns should be used in the "ORDER BY" clause. This feature enables users to define a set of columns that ensure the uniqueness of the returned results for a given table. By selecting the appropriate columns, users can achieve deterministic ordering even in the absence of primary keys or indexes.
Order By dropdown: Located in the Table Settings panel on the right side of the Table view tab, this dropdown lets users choose the columns for the "ORDER BY" clause.
Steps to configure:
Open the Table settings panel in the Table view tab.
Scroll to find the "ORDER BY" dropdown.
Select the desired columns from the dropdown to define the order.
Example scenario:
If a table does not have a primary key or index, and the first column contains duplicates, the application may not order the data consistently. By using the new "ORDER BY" dropdown, users can select a combination of columns (e.g.,
ColumnA, ColumnB, ColumnC) that together provide a unique ordering for the table.
To improve the user experience when loading application screens and panels, Syntho has efficient data loading mechanisms. These aim to ensure smoother interaction, especially when the source database contains a significant amount of data.
Was this helpful?

